 The design of most genuine Soundblaster cards is prepared to use two simple buttons built into the PC case in order to adjust volume. Except some special vendor-specific configurations this possibility is neither used nor well-known (at least it is noted in the online help). Using two simple buttons we can change this in a few minutes .
Needed stuff:
- 2 press buttons, temporary contact, to mount somewhere at/in your case.
- some cable
- recommended if you do not want to solder the cable onto your sound card directly: one male and one female connector (contacts 0,5 mm thick), and a manual 0,5 mm drill
- a soldering tip
Preparing the installation:
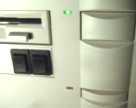
Let´s begin with the most difficult part: Finding a place on the case where to mount the buttons. On my PC, they are mounted on an unused drive slot, but any other place is fine. If you are using headphones directly plugged into your soundcard, you should take special care to find a place which is easy to reach.
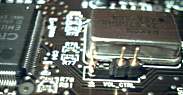 If you want, you may also put the connecting pins onto the soundcard (if they are not already mounted there by the manufacturer). In order to free the PCB holes, take a hand drill (no electric one, you may damage your card), since the large copper ground makes it difficult to unsolder the holes.
Wiring:
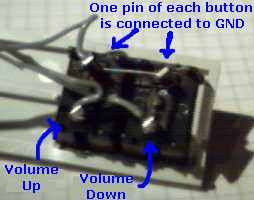
One contact of each button gets connected with the corresponding volume up or volume down pin on the sound card. the third one is connected to the two remaining contacts of the buttons and on the other end of the cable two the GND pin of the card (see pictures). The pins to use on the cards depend on the type of the soundcard (search after hwinfo.hlp on your harddisk and your driver disk in order to find out more):
| ISA-Card | PCI-Card |
|---|
| Pin 1 | Increase Volume | Increase Volume |
|---|
| Pin 2 | GND | unused / GND |
|---|
| Pin 3 | Decrease Volume | Decrease Volume |
|---|
| Pin 4 | | GND |
|---|
Usage:
Depending on the button pressed, the volume is constantly increased or decreased. It is also possible to mute/unmute the output by pressing both buttons simultaneously. You can even watch the volume changing in the mixer program!.